
The evolution of the modern gravel bike seems to have happened overnight, with new technology becoming the norm with things like hydraulic disc brakes, wireless shifting, big gears, big tubeless tires, and even bigger gears and even bigger tires...
Truly a thing to both marvel and covet, especially as road riding becomes more and more dangerous due to bigger and bigger cars and trucks and increasingly distracted drivers. Gravel feels safer, and as the bikes get better and better at taking us riders further and further off the beaten path, off road we will continue to go. Also, it's just plain fun! And with a bike tailored to the ride, that ride becomes even more enjoyable.
Last year I was fortunate to ride a stock Alchemy carbon fiber Ronin gravel bike, as well as my own custom all-road Atlas at a few events, and I thought a lot about what I really wanted for my own true gravel rig. Firstly, my "road" bike, with 32c tires was fast, but sketchy in corners, descents, and rough patches. Secondly, the 42c tires that were specc'd on the Ronin felt slow, and while the bike did everything quite well, I just wished it was, well, a bit less of a gravel bike, and more of a race bike. I discovered that the perfect ride for me was something somewhere in the middle of these two offerings...

I started with a bike fit on my lunch break with our company founder, Ryan. For anyone reading that did not already know, a few of the Alchemy staff are trained and certified bike fitters, and use a neat contraption called a fit bike, that is combined with computers, sensors, and lazers to dial in the angles needed to fit a particular body to a custom geometry. I based my fit off of my trusty Atlas (5 years and 23,000 miles of smiles so far!) but wanted to add clearance for bigger tires, but not too big. I like mixed surface riding, and want to be quick on the road. 38c sounded perfect for achieving a solid balance of road/off road. I wanted the chainstays as short as possible , to climb well and feel snappy in a short sprint. Ryan tweaked the front end geometry to bring my arms up, and in, for a bit more comfort on longer days in the saddle, Unbound Gravel, looking at you! We also adjusted the handling to be a bit more stable and predictable to help out in both the rough stuff and descents, for sure my achilles heel in a gravel race!
I decided to go with titanium, mostly because I have never owned a ti frame, and, well, metal! Our welder and fabricator Jeff is also a true master of his craft, and I am beyond stoked to get to ride one of his creations.
I used a lot of stock options like oversized tubing, disc brakes, semi-internal cable routing and thru axles, and then surprised myself by including routing for a dropper seatpost. I was inspired to do this heavily by Matej Mohoric's incredible ride at this year's Milan San-Remo, look it up if you have not seen his daredevil raid down the Poggio! I am hoping this will give me a better position and a lot more confidence going downhill.

I went with a Sram 11 speed mechanical road shifter set-up, paired with Ratio's 12 speed conversion kit to expand the gear range. I chose this setup based equally on parts availability and cost, and for sure, to be a little different and weird. A Sram 12 speed 1x crank with a big old 46 tooth chainring and power meter up front, and a Sram Eagle 12 speed mountain bike derailleur paired with a ridiculous 10-52 cassette. I don't think that I particularly need a 52 cog, but I am sure I will use it and love it when the right situation presents itself.
With the front shifter lever not being used, it is a simple procedure to remove part of the ratchet mechanism from the shifter, which gives the lever more pull, setting it up perfectly for use with a dropper post.
Similarly fairly easy was converting the rear shift lever to work with the Ratio kit. Open up the shifter body, remove the 11 speed ratchet, and replace with the provided 12 speed ratchet. Ratio has a bunch of different kits, and helpful instructional videos to go along with it.
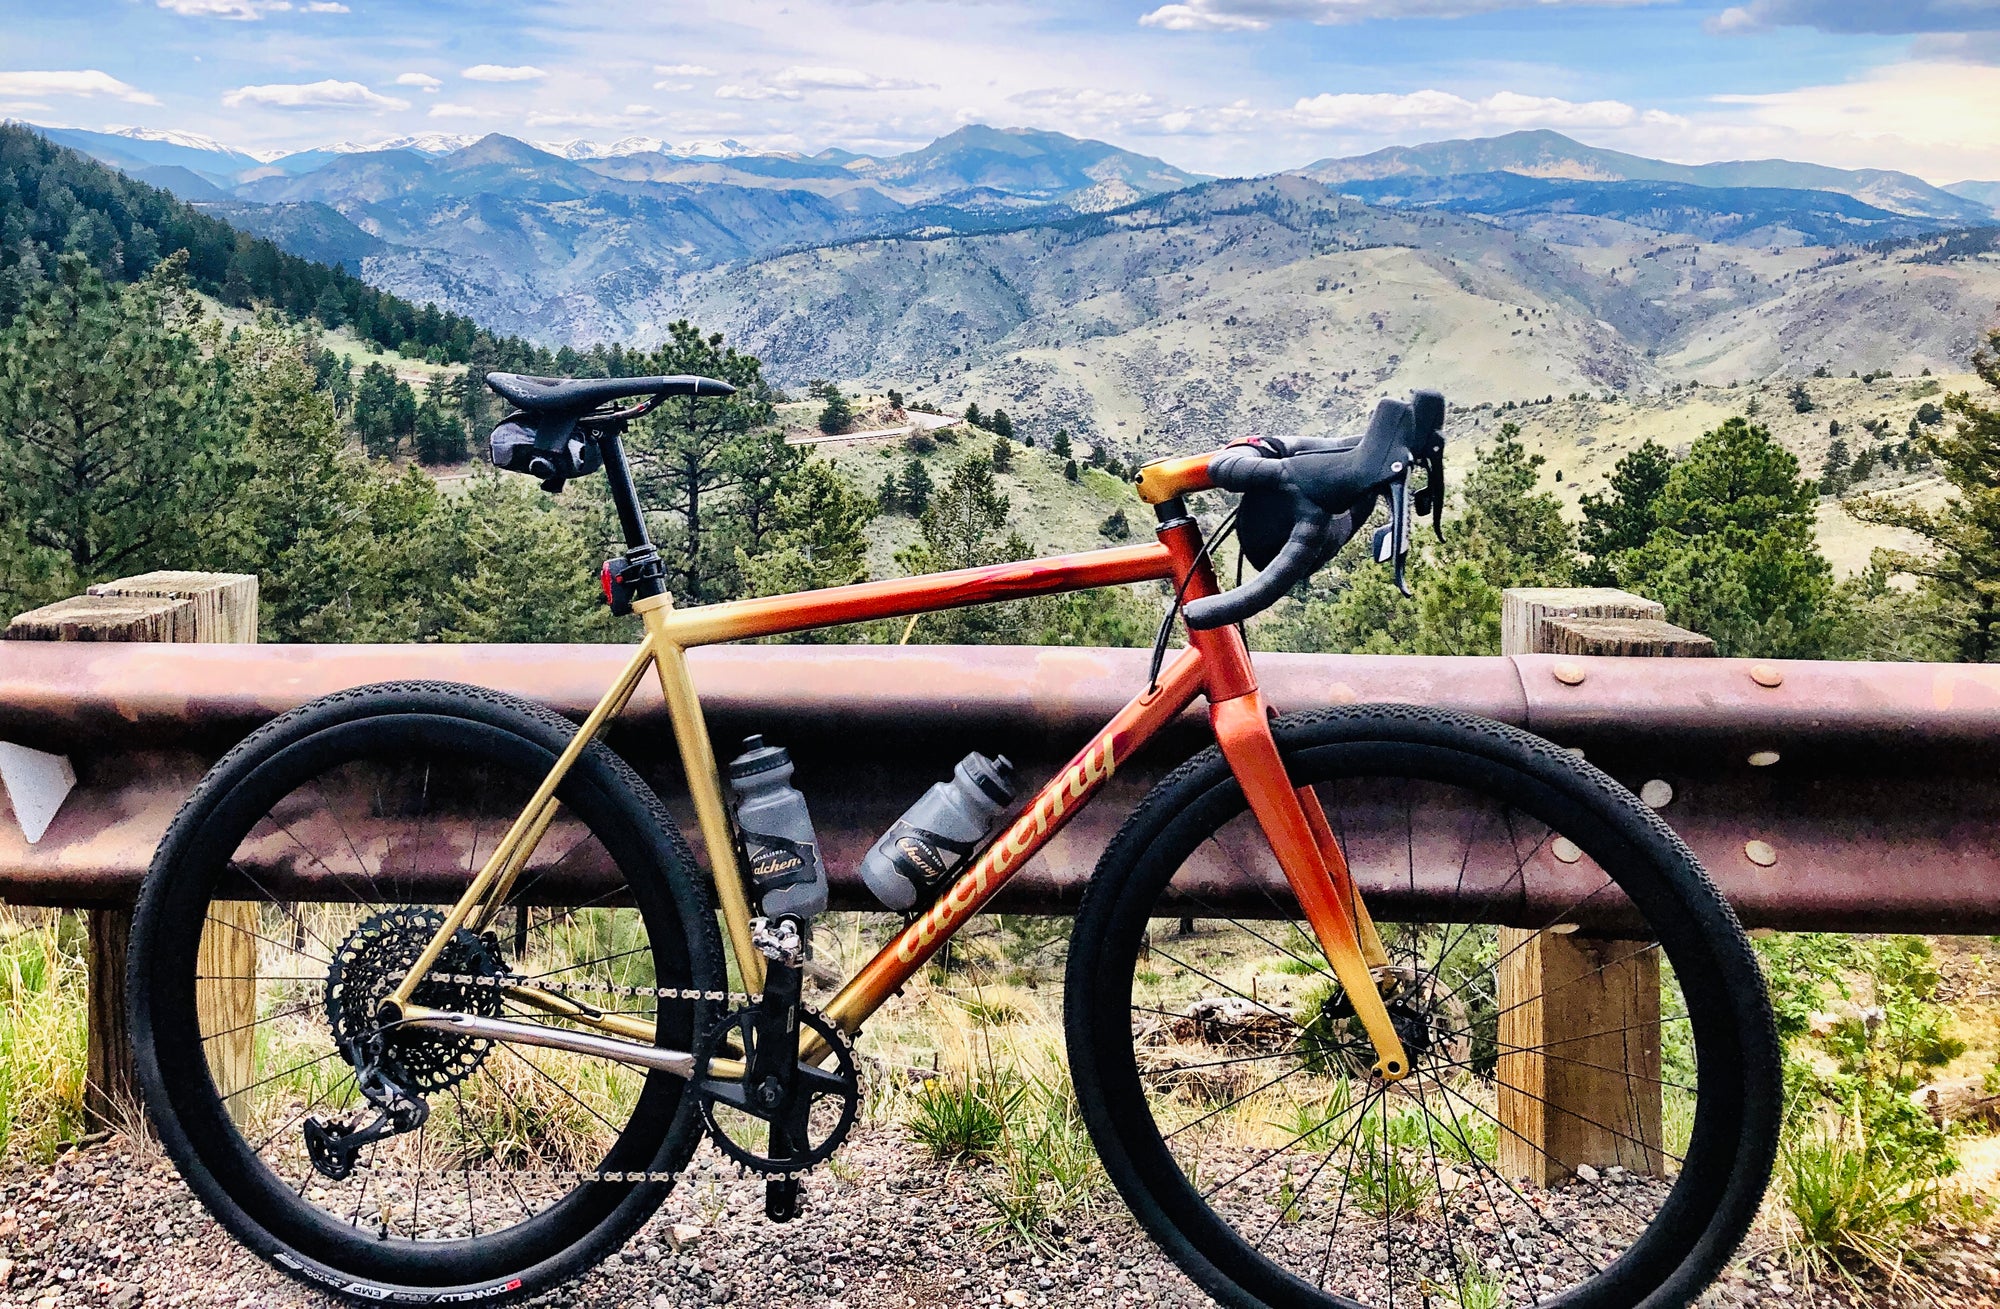
Alchemy house brand wheels (full review coming soon) bars, and stem, 38c Donnelly EMP tubeless tires, a third water bottle mount, and of course, a Spur Cycles handlebar bell round out the build.

On to the fun part - the paint! While I can give myself a pat on the back for executing the finish, I have to give credit to my design team. My wife has a real knack for color and design, and came up with both the overall theme and most importantly, the awesome colors. I was planning on going black with red pearl and some kind of pirate motif, but her vision was so much cooler, enticing, colorful, and just plain badass! Brad, our carbon technician, is multi-talented and helped us put the idea to paper with a working illustration and custom Slayer inspired lettering, not to mention perfect masking files for the flames. All I had to do was put the vinyl masks on straight and spray the paint, easy peasy!

I used all PPG Deltron metallic basecoats: Pure Gold, Sun Kissed Orange, and Cherry Bomb. Fades are cool, flames are fast (I hope!) and I left the drive side chainstay unpainted and polished to give it a timeless look and also show off some of that sweet ti! Sorry not sorry I covered up all of Jeff's perfectly dime-stacked welds with layers and layers of paint! I painted a few custom parts like the valve caps and rotor lockrings, but tried to keep the extra flair to a minimum and the overall look classy and uncluttered. I did paint a flower on my top cap to celebrate my now 5 month old daughter, Poppy, and to also remind me that there is a reason to keep pedaling at mile 190 of this year's Unbound Gravel.
The paint is finished off with a PPG gloss ceramic clear coat to let the metallic paint shine brightly and to also provide extra durability.
Stay tuned for my race preparation guide, and a full race recap and bike review!


Leave a comment (all fields required)